Fall and Halloween are identical with pumpkins. If you want a fake pumpkin but tired of plastic pumpkins, this super easy diy pumpkin from cardboard could be a great idea! You can use it along the Fall season, from welcoming the Fall, fun with Halloween and celebrating thanksgiving. And it’s a very cheap Halloween DIY or Fall DIY or Thanksgiving DIY, whatever you wanted to call it.
Things To Prepare
Very easy DIY pumpkin project, only takes you just about cardboard to make it. Here are exactly what you need to have:
- Cardboard
- Flannel (color: green)
- Orange pumpkin watercolor
- Glue

How To Make
Super easy to make and you don’t have to be too detail, so it’s a quick diy to do. Let me share you how the steps are:
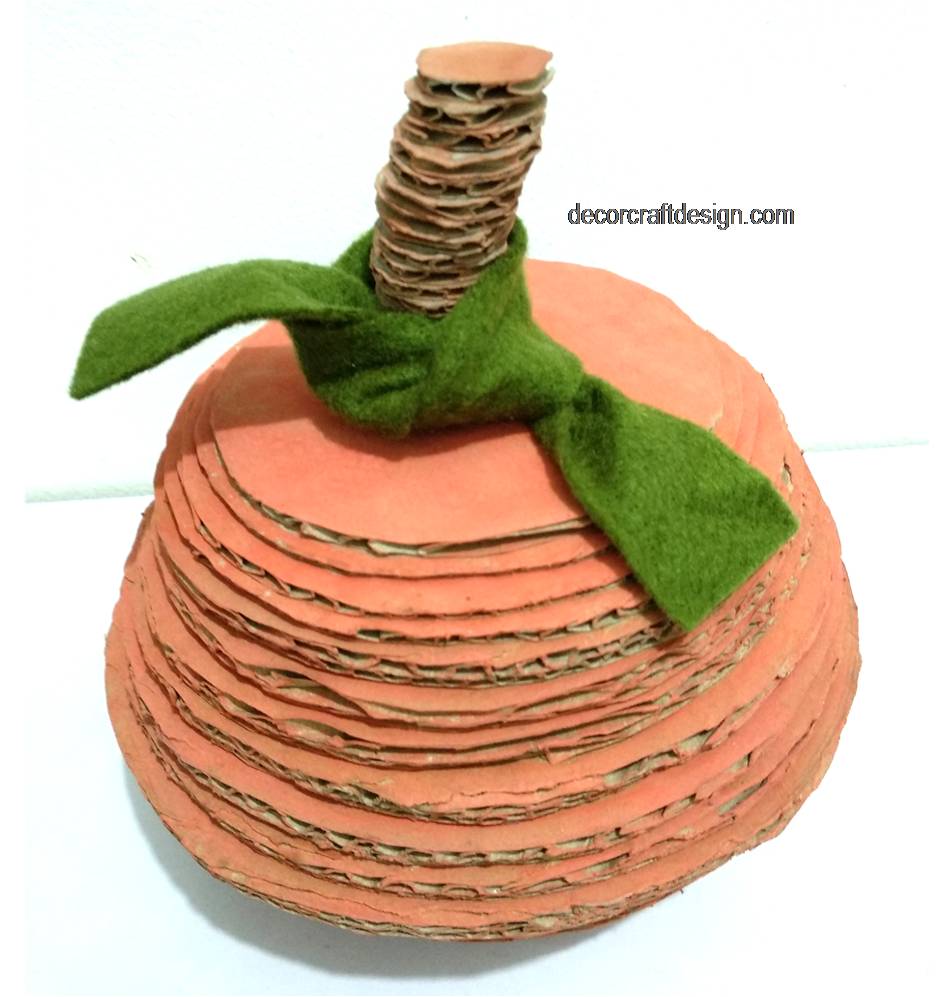
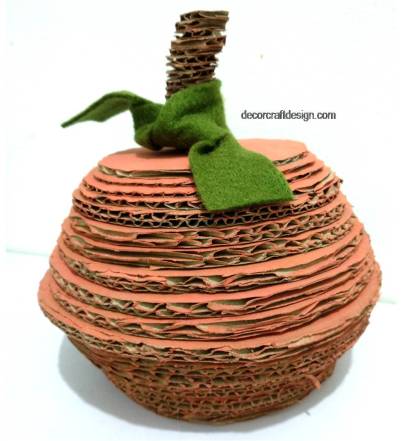
- Draw circle on the cardboard, make a set of two for each diameter. But start with middle circle which only took one circle; I made it in around 3 inches (8 cm). Make a quarter of an inch smaller diameter from one circle to another fir the next circles. So, make 1 middle circle (3 inches), 7 sets of circles with a quarter inch smaller each circle, and 3 circles to continue the 9th circle for the pumpkin’s top; with still a quarter inch smaller for each circle.
- Glue and stack up the circles of cardboard of each diameter. Leave it dry.
- Cut around 3/4 inch of 20 circles on cardboard to make the pumpkin stem. Stack the circles and glue each of it and let it dry.
- Glue the cardboard steam to the cardboard pumpkin and let it dry.
- Paint the cardboard pumpkin with orange pumpkin and some brown watercolor to the stem.
- At last, tie a green flannel to the pumpkin stem. Finished!

This cardboard pumpkin was my other cardboard project that I did, I made a maple tree from cardboard and Fall letters cardboard. Easy and cheap seasonal diy for your Fall and Halloween decor inspiration. A rustic rustic look of the cardboard pumpkin is just a great upcycling project. You can be creative with the colors and decorations of the pumpkin. Be creative and happy trying!
For more of my future Fall and Welcoming Halloween posts, please follow me! And if you wanted to add my creations to your Pinterest boards, please follow me on Pinterest! Also find me on Instagram and Twitter!

![]()

![]()
And for creative fellow bloggers, don’t forget to join “You’re The Star” Blog Hop ! Link your inspiring posts every Monday and get a change to be featured! Starting June 2019, I will be co-hosting the blog hop and would love to see you there! Join and share the news!
See you!
Pump your creativity!
Mel

nice post
LikeLiked by 1 person
Thank you! Happy weekend!
LikeLike
What a fabulous project! This up-cycle is a wonderful way to decorate your home this time of year, perfect 😁. Happy weekend! Hugs, Jo x
LikeLiked by 1 person
Thank you so much, Jo!
LikeLiked by 1 person
What a cute idea!! I love how you use cardboard for crafts. 😀
LikeLiked by 1 person
Thank you so much Michelle!
LikeLiked by 1 person
This is such a cool idea, as always Mel, you are so creative.
LikeLiked by 1 person
Aww, thank you so much, dear!! Happy weekend to you! 🙂
LikeLiked by 1 person
Love the cute idea! How creative!
Happy Monday, Mel!
LikeLiked by 1 person
Thank you so much Veronica! Happy Monday to you too! xo
LikeLike
That’s a brilliant idea, so clever, looks great and costs next to nothing – winner!!!
LikeLiked by 1 person
Aww, thank you so much Julie! Glad I can share my little upcycling idea 🙂
LikeLike
This is such a cute idea. Thank you for sharing with #omhgww.
LikeLiked by 1 person
Thank you so much!
LikeLike
Really creative 🙂
LikeLiked by 1 person
Much love to you Ribana!
LikeLike
So cute! I can imagine an apple done the same way. 🙂
LikeLiked by 1 person
Thank you so much! Yes, it would look great too!
LikeLike